Cloth Diapering 101: A Beginner’s Simple Guide

You’ve been thinking about cloth diapering for beginners, and your brain is swimming with questions. Will it be gross? Will the laundry pile up?
Will you lose your mind at 3 a.m. with a screaming baby and a soggy diaper cover?
Here’s the honest answer: it’s simpler than the mommy-blog echo chamber makes it sound. The key is picking the right system for your life before you buy anything. The global cloth diaper market was valued at over $427 million in 2024, and most parents report the washing routine takes about 15 minutes of hands-on time every two days.
Once you understand the core decision points, everything else falls into place.
Quick Answer
Cloth diapering for beginners means choosing a diaper system, buying a supply, and washing them on a schedule. Start with one-size pocket diapers for convenience, or prefolds and covers to save money. You’ll need 18 to 24 diapers for full-time use.
Wash every two to three days using a two-cycle routine. That’s it. The learning curve is about two weeks.
The Honest Truth: Why Cloth Diapering Feels Overwhelming (and Why It’s Not)
The fear is real, but it’s usually based on outdated information. Most parents imagine a giant bucket of ammonia-soaked rags and hours at the washing machine. Neither of those images matches reality as of 2026.
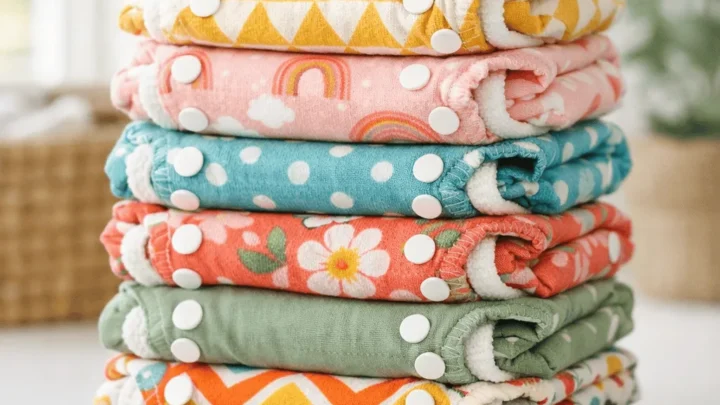
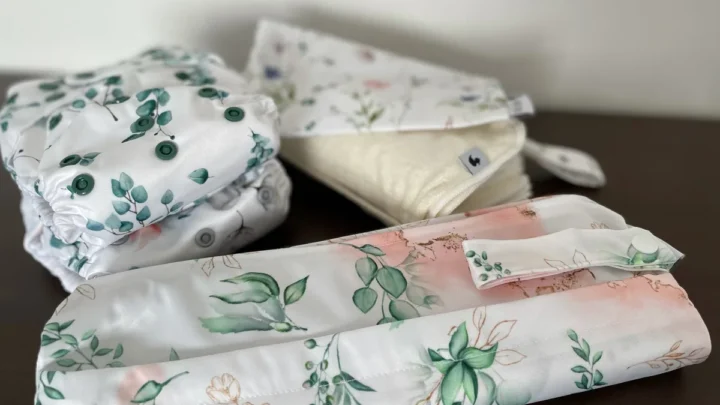
Modern cloth diapering runs on two simple components: an absorbent layer that catches wetness and a waterproof cover that keeps it off everything else. That’s the entire concept. Everything beyond that is a variation on the same core idea.
Why New Parents Hesitate
The biggest hurdle is psychological, not practical. Poop feels like a dealbreaker until you’ve done it twice. Here’s what usually changes minds:
- The “gross” factor evaporates fast. The first few changes feel awkward. By week two, it’s as routine as buckling a car seat.
- Laundry anxiety is manageable. You’re washing once every two to three days, not every hour.
- The cost saving is immediate. Disposables cost roughly $70 to $80 per month. Cloth diapering costs a one-time setup fee.
- Daycare fears are overblown. Most centers accept cloth if you provide a labeled wet bag and easy-to-use diapers.
What You Actually Need to Decide First
Before you buy anything, answer these three questions. They determine which system you’ll thrive with:
- What’s your budget? This decides between prefolds (cheapest) and all-in-ones (most convenient).
- How much time do you want to spend on laundry? Flats dry fast. Hemp inserts take forever.
- Who else will change the baby? Daycare workers and grandparents will not fold a prefold. They’ll accept a pocket diaper.
Every other question comes after these.
The 5 Diaper Systems Explained (Without the Fluff)

There are five main systems. Each has trade-offs between cost, convenience, and drying time. There is no objectively best option.
There is only the best option for your specific situation.
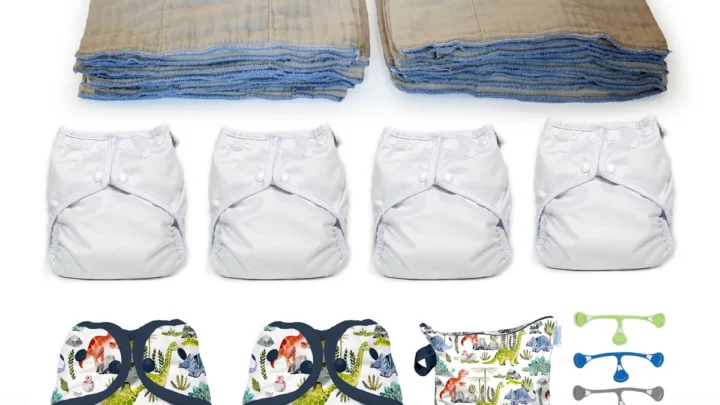
1. Prefolds and Covers: The Budget Classic
What it is: A rectangular, multi-layered cotton pad that you fold around the baby, then secure with a Snappi or pins. A waterproof cover goes over the top.
Best for: Parents on a tight budget, people who don’t mind a little folding, and anyone who wants the fastest-drying option.
The numbers: A starter set of 24 prefolds and 6 covers runs about $200 to $300. You can outfit your entire baby for less than two months of disposable costs.
The catch: You must fold. It takes 10 seconds once you learn, but it’s a skill. Covers can be reused between changes if they stay dry, which saves laundry.
2. Flats: The Grandpa Option That’s Secretly Brilliant
What it is: A single, large square of birdseye cotton that you fold into whatever shape you need. Nothing else is simpler.
Best for: Frugal parents, those who want one size to fit from birth to potty training, and anyone who air-dries exclusively.
The numbers: A dozen flats costs around $30. They’re the cheapest option, period. They also dry faster than anything else on this list.
The catch: They require the most folding skill and the most layers to build absorbency. Nighttime use needs doubling or added boosters.
3. Fitted Diapers: The Overnight Hero
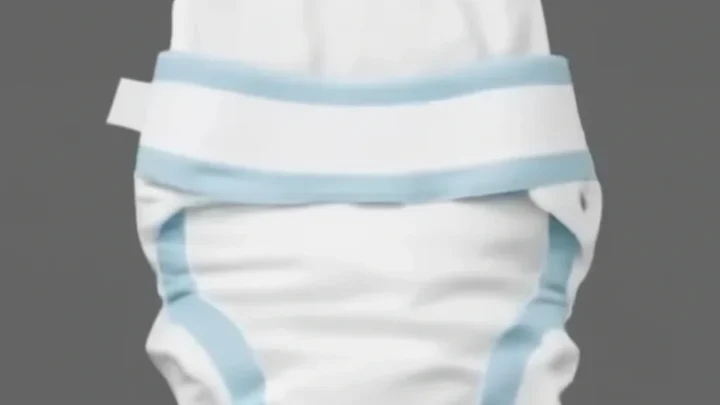
What it is: A shaped, absorbent diaper that snaps or velcros around the baby like a disposable, but it’s not waterproof. You still need a cover.
Best for: Heavy wetters, overnight use, and parents who want the shape of a disposable without the synthetic materials.
The numbers: Fitteds cost $15 to $25 each. They’re expensive compared to prefolds but bulletproof for leak prevention.
The catch: They don’t dry quickly, and they need a separate cover. That’s two things to manage per change.
4. Pocket Diapers: The People-Pleaser
What it is: A waterproof outer shell with a fleece inner lining. There’s a slit where you stuff an absorbent insert.

Best for: Daycare parents, partners who resist change, grandparents. It’s the closest to a disposable in terms of how you put it on.
The numbers: A complete pocket setup (diaper + insert) runs $12 to $20 each. You’ll need 18 to 24 for full-time use.
The catch: Stuffing pockets is tedious. Some parents buy an extra dozen inserts and pre-stuff all diapers once a week. Drying takes longer because the shell and insert must dry separately.
5. All-in-Ones and All-in-Twos: The Convenience Kings
What it is: All-in-ones (AIOs) have the absorbent layer sewn directly into the waterproof shell. All-in-twos (AI2s) have a snap-in or lay-in insert that separates from the shell.
Best for: Parents with zero patience for assembly, part-time cloth users, and anyone who values speed over cost.
The numbers: AIOs cost $18 to $30 each. They’re the most expensive system, but they’re also the most foolproof.
The catch: AIOs dry slowly, sometimes taking 24 hours. AI2s let you reuse the shell between changes and dry faster, but the snap-in inserts shift if you don’t place them right.
The Real Cost: What You’ll Spend vs. What You’ll Save
Let’s talk dollars, because that’s usually the deciding factor. The numbers below reflect current market research and aggregate pricing from major retailers.
What You’ll Spend Up Front
| System | Full Stash Cost (New) | Secondhand Cost | Drying Speed |
|---|---|---|---|
| Flats + Covers | $100–$150 | $50–$80 | Fast (2–4 hrs) |
| Prefolds + Covers | $200–$300 | $100–$150 | Fast (3–5 hrs) |
| Fitteds + Covers | $350–$500 | $150–$250 | Slow (6+ hrs) |
| Pockets | $250–$400 | $125–$200 | Medium (4–6 hrs) |
| All-in-Ones | $350–$550 | $175–$300 | Slow (6–12 hrs) |
Hidden Costs Nobody Talks About
The diaper itself isn’t the only expense. Budget for:
- Detergent: Cloth-safe detergent costs $10 to $15 per bottle, lasting 2 to 3 months.
- Water and electricity: Expect $5 to $10 extra per month on utility bills.
- Wet bags: Two large wet bags for home, two small ones for outings. That’s $40 to $60.
- A diaper sprayer or liners: $30 to $50 once, or ongoing liners at $10 per roll.
- Replacement parts: Snappis wear out. Snaps break. Inserts naturally degrade after 12 to 18 months.
The Breakeven Point
Here’s where it gets good. Disposables cost $70 to $80 per month for the first 2.5 to 3 years. That’s $2,100 to $2,880 total.
Cloth diapering costs:
- $250 to $550 for a new stash
- $20 to $30 per month for detergent and utilities
- ~$1,000 to $1,400 total over 3 years
You break even somewhere between month 4 and month 8, depending on your system and whether you buy used. Every month after that is pure savings. If you have a second child, you double the savings because the stash is already paid for.
Washing Without Losing Your Mind: The 3-Step Routine
The laundry fear is the #1 reason people quit cloth. Here’s the secret: it’s a system, not a chore. Follow these three steps, and you’ll never smell ammonia or see a stain you can’t fix.
Step 1: The Pre-Wash (Cold or Warm, Short)
What it does: Rinses away urine and loosens solid waste so the main wash can do its job.
How to run it:
- Dump the soiled diaper pail liner and all contents into the washer.
- Add just half the normal amount of detergent.
- Run a short, cold or warm cycle (30 to 45 minutes max).
- If you use a diaper sprayer, this step handles any leftover residue.
Pro tip: If you skip this step, you’ll get ammonia buildup. That’s what causes that stink you’re terrified of.
Step 2: The Main Wash (Hot, Long, Heavy)
What it does: Actually cleans and sanitizes the fabric.
How to run it:
- Use the full amount of cloth-safe detergent.
- Set the cycle to hot water on the heaviest setting available.
- Keep the load size to 2/3 to 3/4 full. Too many diapers = no agitation = still dirty.
- If your washer has a “sanitize” or “heavy duty” option, use it.
The water hardness rule: Per the EPA, water hardness above 120 ppm interferes with detergent performance. If your water is hard, you’ll need to add a water softener or use a specific hard-water routine. Check your local water report before you start.
Step 3: Drying (The Rule of Thumb)
What can go in the dryer:
- Cotton prefolds and flats (low heat)
- Pocket shells (low heat, but they degrade faster)
- Hemp and bamboo inserts (low heat)
What must line-dry:
- PUL covers (the heat melts the waterproof coating)
- Wool (it will shrink to doll-size)
- Any diaper with printed elastic
Drying times if you line-dry:
| Material | Approximate Time |
|---|---|
| Cotton prefolds | 2–4 hours |
| Bamboo inserts | 4–6 hours |
| Hemp inserts | 6–8 hours |
| PUL covers | 1–2 hours |
| Wool | 24+ hours |
The Troubleshooting Decoder
When something goes wrong, identify it by symptom:
- Ammonia smell: Detergent buildup or not enough agitation. Run an extra rinse cycle.
- Repelling (water beads off): Too much detergent. Strip the diapers with a little bleach and restart.
- Yeast or rash: Kill the yeast with a hot wash and a splash of bleach, then sun-dry.
- Stains: Sunlight bleaches cotton naturally. Hang wet diapers in direct sun for 2 to 4 hours.
The non-strip hard water routine is a deep dive, but the short version is: more agitation, less detergent, and a final rinse aid.
Newborn vs. One-Size: Choosing Your Starting Point
This is the most common fork in the road. There are two paths, and both are valid. The question is what fits your situation.
The Newborn Path: Buy Small, Start Early
What it is: Sized diapers designed specifically for babies under 10 pounds. They fit better, leak less, and handle the truly insane newborn poop frequency (10 to 12 changes per day).
The numbers: A newborn stash is 24 to 36 diapers. That usually means a fresh wash every day and a half. Cost runs $250 to $450 if you buy new.
Most families use this window for 6 to 10 weeks.
Who it’s for: Parents who want the best fit from day one, those with a small baby, and people who plan to start immediately.
The catch: You’ll outgrow them fast. Some babies jump to one-size by 8 weeks. That’s a short use window for the money.
The One-Size Path: Buy Once, Adjust as You Go
What it is: Diapers with adjustable rise snaps and waist snaps. They fit from roughly 8 to 35 pounds. One diaper carries you from newborn chub to potty training.
The numbers: One-size diapers work best at 12+ pounds. Expect leaks on a 9-pound baby, especially around the thighs. Cost runs $250 to $500 for a full stash.
Who it’s for: Budget-focused parents, those having a second child, and anyone who hates buying twice.
The catch: The fit on a scrawny newborn is rough. You’ll get blowouts. The workaround is buying a less expensive option (prefolds with a small cover) until the baby hits 12 pounds.
The Hybrid Strategy: What Most Parents Actually Do
Here’s the common-sense middle ground:
- Start with a pack of disposable newborn diapers for the first few days. Meconium is sticky, black, and awful to rinse. Give yourself grace.
- Use cloth diapers part-time from week 2 onward, during daytime hours. Use disposables at night until you find a nighttime routine.
- Switch fully to one-size cloth at 12 pounds. That’s when they fit properly and the cost savings accelerate.
Daycare, Travel, and Part-Time Cloth
Cloth diapering doesn’t have to be an all-or-nothing commitment. Many families use cloth at home and disposables when they travel or while the baby is at daycare.
If you’re traveling, pack a small wet bag and bring 6 to 8 diapers. You’ll use the stay-dry packs on the go and wash when you arrive. It’s manageable.
You just have to plan the wash day.
If daycare is a concern, talk to the director before enrolling. Most accept cloth if you provide labeled diapers and a clean wet bag each day. Pockets and AIOs are the accepted options because teachers don’t want to fold or stuff.
If the daycare says no, consider a greener nursery setup with eco-friendly disposables for daycare hours.
The 7 Mistakes Every Beginner Makes (And How to Skip Them)
You will make mistakes. That’s fine. Here are the ones that waste time and money, and how to avoid them.
1. Buying Too Much Too Early
You don’t need a full stash before birth. You need enough to last two days between washes. If you buy 20 diapers and hate the fit, you’re stuck with 20 regrets.
Fix it: Start with 6 to 10 diapers from one system. Try them for a week. Then commit.
2. Using the Wrong Detergent (or Too Much of It)
Regular detergents contain oils and softeners that coat fabric and cause repelling. Fabric softeners are even worse. They literally seal the absorbent fibers.
Fix it: Use a detergent specifically labeled cloth-diaper-safe. Use the exact amount on the label. Too much detergent is worse than too little.
3. Ignoring Water Hardness
If you live in a hard-water area, your diapers will slowly build up mineral deposits. That causes ammonia stink that appears in the first 30 minutes of wear.
Fix it: Check your municipal water report. If hardness is above 120 ppm, add a water softener to your pre-wash or main wash.
4. Snapping Too Tight or Too Loose
A diaper that’s too tight leaves red marks and causes hip discomfort. Too loose means leaks. Most beginners default to “tight” because they fear leaks.
Fix it: You should be able to fit two fingers flat between the waistband and the baby’s belly. The leg gussets should sit in the natural crease of the thigh.
5. Skipping the Prep Wash
Natural fibers like cotton and hemp need to be washed 3 to 6 times before the fabric reaches maximum absorbency. If you skip this, the first week will be leak city.
Fix it: Wash new diapers on hot 3 to 6 times. Or just accept the leaky first week as part of the process.
6. Not Having a Backup Plan
There will be a day when you’re sick, the baby has a stomach bug, and the washer breaks. If you have zero disposables, you’re in a bad spot.
Fix it: Keep a pack of eco-friendly disposables around. The sensitive skin comparison can help you pick one that isn’t loaded with fragrance.
7. Quitting at Week 3
The first three weeks have a demonic learning curve. Then suddenly, it clicks. The elastic settles, the folds become automatic, and leaks become rare.
Parents who quit at week 4 often say week 3 was worse than they expected and week 4 was better than they imagined.
Fix it: Give it a full month. Set a calendar reminder for day 30 and assess then.
Expert Tips / Pro Advice
The people who’ve done this for years have a few tricks that make life dramatically easier. Steal these.
- Pre-stuff pockets once a week. Spend 15 minutes on Sunday stuffing a week’s worth of diapers. Grab and go all week.
- Use one-size covers with a small insert. For a growing baby, one cover can adapt to multiple sizes if the insert is sized right.
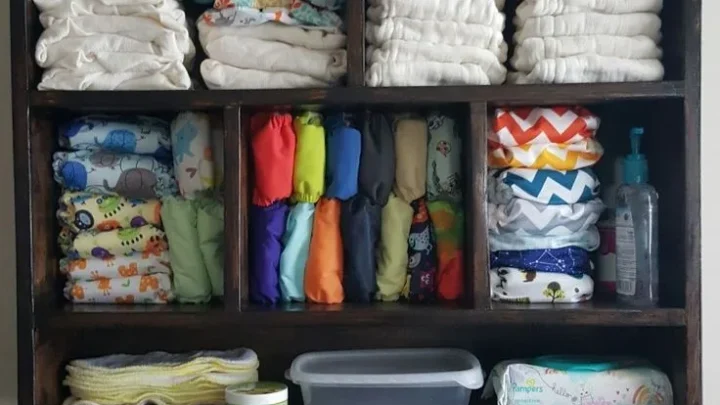
- Ditch the diaper pail. A covered trash can with a washable liner works better and costs less than a branded pail.
- Sun-dry on a clothesline. Sunlight bleaches stains and kills bacteria without chemicals. Free, effective, and silent.
- Build a nighttime system. The daytime stash is different from the overnight setup, which needs a fitted or doubled insert. Start with that distinction from day one.
Frequently Asked Questions
How many cloth diapers do I need for a newborn?
Plan on 24 to 36 diapers for a newborn. At 10 to 12 changes per day, that gives you roughly two days between washes. One-size systems work best around 12 pounds, so the number drops to 18 to 24 once your baby passes that mark.
How do I wash cloth diapers for the first time?
Run new cotton and hemp diapers through a hot wash cycle 3 to 6 times before first use. This removes natural oils and opens the fiber, making the fabric fully absorbent. PUL covers and pocket shells only need one wash before the first use.
Can I use cloth diapers at night without leaks?
Yes. The trick is a fitted diaper or doubled inserts paired with a wool or fleece cover. Lighter daytime diapers will leak, so build a separate nighttime stash with extra absorbency.
Expect to test a few setups before you find one that works.
Are cloth diapers better for sensitive skin?
Generally yes. Cotton and hemp are breathable, fragrance-free, and free of the superabsorbent polymers common in disposables. If the baby develops a rash, switch to a cloth-safe cream or a disposable briefly while you treat the skin.
What do I do with the poop?
Shake solids into the toilet before washing. For older babies, use a diaper sprayer to rinse residue off. For newborns who breastfeed, the poop is water-soluble and washes out without any pre-rinse.
Add a reusable liner if you prefer, but it’s optional.

Similar Posts