How to Wash Cloth Diapers: Easy Step-by-Step Guide
How to Wash Cloth Diapers: The Complete Guide
Let's be honest: figuring out how to wash cloth diapers is the steepest part of the cloth diaper learning curve. You've made the switch to save money and reduce waste, but suddenly you're obsessing over water hardness, detergent enzymes, and whether your washer's "sanitize" cycle is actually killing bacteria or just cooking stains into the fabric.
The good news? The routine is simpler than the internet makes it sound. Once you understand the why behind each step, the how becomes second nature.
As of 2026, the consensus across manufacturer specifications and pediatric dermatology guidance points to a two-wash system with specific temperature and detergent targets. Get those right, and you'll avoid the three biggest cloth diaper killers: ammonia burns, detergent buildup, and lingering yeast infections. Let's break down exactly what your diapers need, why they need it, and how to troubleshoot when things go wrong.
Quick Answer
Wash cloth diapers every 2 to 3 days. Run a cold rinse cycle first to flush urine and loose stool. Then run a hot main wash at 60°C (140°F) with a full scoop of enzyme-based detergent.
Add an extra rinse if you have hard water or a high-efficiency washer. Dry inserts and shells separately. Never use fabric softener or dryer sheets.
Air dry PUL covers to protect the waterproof layer.
Why This Matters: The Consequences of Getting It Wrong
A bad wash routine rarely announces itself immediately. It builds quietly. Your diapers start smelling slightly sour when wet.
You notice a faint ammonia odor when you open the pail. Then one day, your baby has a angry red rash that won't clear up with cream. That's not a random rash.
That's the result of urine salts and bacteria re-depositing on fabric that wasn't properly cleaned.
Here's what's actually at stake beyond diaper rash:
The ammonia problem is serious. When urine sits in fabric and isn't fully rinsed away, bacteria break down the urea into ammonia. Ammonia is caustic. It burns skin on contact, and babies with repeated exposure develop painful chemical burns that look like a classic "diaper rash" but won't respond to zinc oxide or petroleum jelly.
In our research, ammonia buildup is the number one reason parents quit cloth diapering entirely.
The financial damage is real. A full cloth diaper stash costs anywhere from $200 to $400. Washing with fabric softener or dryer sheets can ruin the absorbency of microfiber inserts permanently. Hot water on the wrong cycle can delaminate the PUL (polyurethane laminate) in pocket diapers and covers, causing them to leak.
When you ruin a diaper, you're not just throwing away fabric. You're throwing away money.
The health risks extend beyond skin. Yeast infections (Candida) thrive in damp, improperly sanitized fabric. If your baby gets a yeast infection, you need to wash diapers at high heat or use bleach. Without that step, the spores survive and reinfect your baby every time you put a diaper on.
This becomes a frustrating cycle that's entirely preventable with the right wash protocol.
The good news in all of this? Every single one of these problems is avoidable. You just need to understand what you're washing and how to match your routine to your water and washer.
The Science of a Dirty Diaper: What You're Actually Washing Away
If you want to nail the perfect wash routine, you need to know your enemy. A dirty cloth diaper isn't just "dirty." It's a specific combination of biological materials that each require different removal strategies.
Urine salts are the primary offender. Urine is mostly water, but it contains urea, uric acid, and various salts. When urine dries into fabric, those salts crystallize. On their own, they're not dangerous.
But when they mix with bacteria and moisture, they break down into ammonia. That's the smell you notice when a diaper pail is left too long. Cold water rinses help dissolve these salts before they crystallize.
Stool changes everything. Here's where the science gets interesting:
- Exclusively breastfed or chestfed baby poop is water-soluble. It rinses away in a cold cycle without any scraping or spraying. This is the easiest stage of cloth diapering.
- Formula-fed baby poop is not water-soluble. It contains fats and proteins that bind to fabric. This is when you need a diaper sprayer or disposable liners.
- Solid food and toddler poop is the hardest to remove. It can contain undigested fibers and bacteria that require mechanical agitation to loosen.
Fiber type matters more than you'd think. Cotton fibers swell when wet and release trapped particles easily. Microfiber, on the other hand, is like a sponge with millions of tiny loops. It holds onto oils, detergent residue, and bacteria much more aggressively.
That's why microfiber inserts need hotter water and more thorough rinsing than cotton prefolds.
Water hardness changes the entire equation. Hard water, which contains high levels of calcium and magnesium, interacts with detergent in a specific way. The minerals bind with the surfactants in the detergent, reducing its cleaning power and leaving a film on fabric. If you have hard water (above 7 grains per gallon), you'll need more detergent or a water softener like borax or Calgon.
Soft water requires less detergent. Using too much in soft water causes buildup. Using too little in hard water leaves mineral scale.
The single best investment you can make is a $10 water hardness test kit from a hardware store.
The role of "soaking." Your grandparents might have soaked diapers in a pail of water with borax. We now know that's counterproductive. Wet pailing creates a breeding ground for bacteria and actually accelerates ammonia formation.
Modern guidelines recommend dry pailing: storing diapers in a ventilated pail or wet bag until wash day.
The Core Wash Routine: Step-by-Step Instructions That Work
Now for the part you actually came here for. This routine works for the vast majority of households. It's based on the recommendations from major cloth diaper manufacturers (Thirsties, BumGenius, and GroVia all publish similar guidelines) and the American Cleaning Institute's laundry science.
Step 1: Storage and Pre-Rinse
Keep dirty diapers in a dry pail or a waterproof wet bag with a zipper. Do not soak them. Zip the bag closed to trap smells but allow airflow.
Every 2 to 3 days, dump the entire load into the washer.
Run a cold rinse cycle with no detergent. This does two things: it flushes out urine salts before they crystallize, and it prevents protein-based stool stains from setting. Cold water is non-negotiable here.
Hot water cooks protein into the fabric fibers.
Step 2: The Main Wash
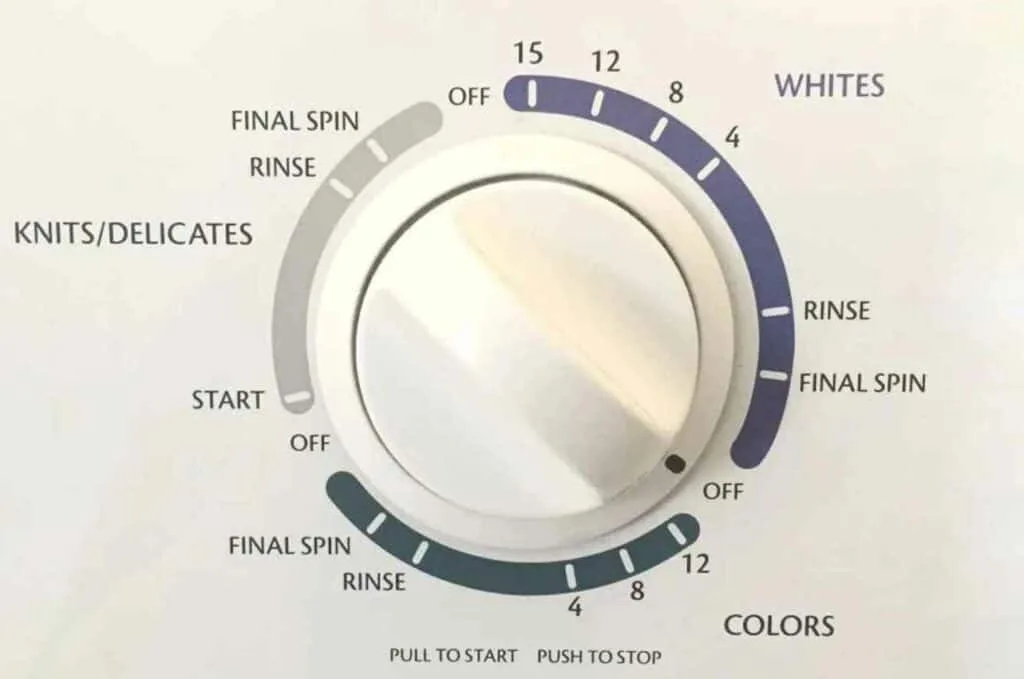
This is where the real cleaning happens. Set your washer to the heavy-duty or normal cycle with the hottest water your machine provides, ideally 60°C (140°F) or higher. Add your detergent.
Here's the part most people get wrong: you need more detergent than you think. HE washers use less water, so the detergent concentration is higher, but you still need enough to lift oils and neutralize ammonia. A standard scoop of enzyme-based detergent (like Tide Free & Gentle or Rockin' Green) is usually correct. If you have hard water, add 1/2 cup of borax or washing soda to the drum.
Step 3: The Extra Rinse
An extra rinse is not optional if you have a high-efficiency front loader. These machines use very little water, which means detergent residue can linger. Run an extra cold rinse cycle to flush everything out.
If your diapers smell clean after this rinse, you're done. If they still smell like detergent or have a slight chemical scent, you need another rinse.
Step 4: Drying
This step varies by diaper component, and getting it wrong damages your stash:
| Component | Drying Method | Why |
|---|---|---|
| Cotton prefolds/flats | High heat tumble or line dry | Heat sanitizes, cotton tolerates it |
| Bamboo/Hemp inserts | Low heat tumble or line dry | Can shrink at high temps |
| Microfiber inserts | Line dry or low heat | High heat melts the fibers over time |
| PUL covers/pockets | Air dry only | Heat delaminates the waterproof layer |
| Wool covers | Air dry flat | Heat shrinks and felts wool |
Sun drying is your secret weapon. Ultraviolet light naturally neutralizes bacteria, bleaches stains, and removes odors. A few hours in direct sunlight will brighten stained diapers better than any chemical. This is the cheapest stain remover on the market.
Step 5: Immediate Inspection
The moment diapers come out of the dryer, smell them. A clean diaper should smell like absolutely nothing. If you detect any ammonia or sourness, that's a warning that either your water temp was too low, your detergent dose was too low, or your washer is overloading.
Troubleshooting: Fixing Stink, Repelling, and Stains
Even with a perfect routine, problems happen. Water changes. Washers break.
Detergent formulas change. Here's how to diagnose and fix the most common issues.
Ammonia Buildup
Symptoms: Strong smell when diaper is wet, red rash with blisters or shiny skin, odor that returns quickly after washing.
The fix: Run a hot wash with an extra rinse using an enzyme detergent. If that doesn't work, you need to strip the diapers. Soak in a bathtub with 1/4 cup of bleach per 10 gallons of water for 30 minutes, then wash hot twice with extra rinses.
Never mix bleach with other additives.
Detergent Buildup
Symptoms: Diapers feel stiff or crunchy, repel water (fluid beads on the surface), white residue on fabric, smell "clean" until wet.
The fix: Stripping removes detergent residue. Use a commercial stripper like GroVia Mighty Bubbles or a DIY method: fill the tub with hot water, add 1 tablespoon of dish soap (Dawn works well), and let diapers soak for a few hours. Agitate periodically.
Rinse thoroughly. The water will look cloudy or sudsy. Repeat until the water runs clear.
Yeast or Bacterial Infection
Symptoms: Persistent rash with red spots or satellite lesions, diaper smell that survives washing, rash that doesn't respond to regular cream.
The fix: You need to sanitize, not just wash. Run diapers through a hot wash with bleach (1/2 cup per load) or use a high-heat dryer cycle. The CDC recommends washing at 60°C (140°F) or higher with bleach to kill Candida spores.
Continue for two weeks after the rash clears to prevent recurrence.
Hard Water Scale
Symptoms: Diapers feel like sandpaper, gray or dull-looking fabric, reduced absorbency.
The fix: You're dealing with mineral buildup. Use a water softener in every wash. For a deep clean, soak diapers in water with 1 cup of white vinegar for 30 minutes, then wash hot with extra rinses.
Vinegar dissolves calcium and magnesium deposits.
Persistent Stains
Symptoms: Brown or yellow marks, rust-colored spots, gray discoloration.
The fixes:
- Old poop stains: Sun bleach them. Lay diapers in direct sunlight while damp. UV rays break down organic matter.
- Iron/rust stains: Use lemon juice and sunlight, or a specialized rust remover (but test on a hidden spot first).
- Mildew: Wash with oxygen bleach (like OxiClean) in hot water. Do not use chlorine bleach on colored fabric.
Mistakes That Ruin Diapers: What NOT to Do
You now know the right way. Let's talk about the traps that catch even experienced cloth diapering parents.
Fabric Softener and Dryer Sheets
This is the single most damaging mistake you can make. Fabric softener coats fibers with a waxy layer that destroys absorbency. Once it's on microfiber or cotton, it's nearly impossible to remove completely.
The fabric will repel liquid instead of absorbing it. The same goes for dryer sheets. If you accidentally run a dryer sheet through a load of diapers, you'll likely need to strip the entire stash.
Cold Water Only
Some parents think cold saves energy and preserves fabric. That's true, but cold water doesn't sanitize. It doesn't kill bacteria, it doesn't dissolve oils, and it doesn't neutralize ammonia.
The main wash needs hot water, period. If you're concerned about energy use, remember that washing fewer, full loads at hot temps is more efficient than washing more loads at cold temps.
Skipping the Pre-Wash
The pre-wash isn't optional. It serves a specific purpose: flushing out the bulk of urine and stool before the main wash. Without it, your hot wash water becomes a bath of ammonia and bacteria that re-deposits onto the fabric.
Treat the pre-wash like a toilet flush, and the main wash like the actual cleaning.
Overloading the Washer
Your washer needs room to actually agitate the diapers. If it's packed to the brim, water and detergent can't circulate. A good rule: diapers should be loosely packed, with room to move freely.
If you're washing a full load, consider splitting it into two loads or adding some towels as "bulk" to create friction.
Using Too Much Detergent
Counterintuitively, more detergent doesn't mean cleaner diapers. Excess detergent leaves residue that attracts dirt and bacteria. If you have soft water, a simple free-and-clear detergent at half the recommended dose is often sufficient.
If you're unsure, run a swish test: put a clean diaper in a clear glass of water and swirl. If the water gets cloudy or sudsy, you have detergent residue.
Ignoring Your Water Hardness
This deserves repeating because it's the root cause of many wash failures. A quick test from a hardware store takes five minutes. The results will tell you exactly how much detergent and softener you need.
If you have hard water (above 7 gpg) and you're using standard detergent without a softener, you're washing with soap that's being deactivated by minerals. Your diapers aren't getting clean, and you'll wonder why they smell.
Using the Wrong Detergent
Some detergents are too harsh for cloth diapers. Anything with added fragrance, optical brighteners, or aggressive enzymes can cause skin irritation and buildup. Stick to free-and-clear formulas or specialty cloth diaper detergents.
Avoid cheap, perfumed supermarket brands. The American Cleaning Institute's guidelines on sensitive-skin laundry are a good reference point.

Similar Posts