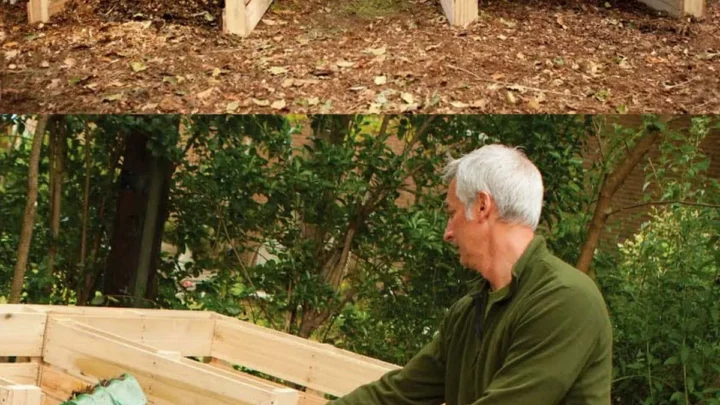
DIY Compost Bin: Easy Step-by-Step Guide for Beginners

Building a diy compost bin gives you total control over size and materials. You avoid the high markup of store-bought units while customizing the design for your specific yard. This approach lets you use upcycled wood or heavy-duty plastic that lasts longer than cheap retail options.
A properly built bin maintains internal temperatures between 130°F and 160°F. This heat range kills weed seeds and pathogens effectively according to USDA guidelines. We will walk through the exact steps to build a system that reaches these metrics reliably.
Quick Answer
A diy compost bin saves money and fits any space.
Use untreated cedar or redwood for durability.
Maintain a 30 to 1 carbon nitrogen ratio.
Drill holes for essential airflow and drainage.
Keep the pile moist like a wrung sponge.
Why DIY Beats Buying: The Real Cost and Customization Advantage
Store-bought composters often cost between $100 and $300. Many use thin plastic that becomes brittle after one summer of UV exposure. Building your own allows you to select rot-resistant materials like cedar or heavy-gauge wire.
You can tailor the dimensions to fit a tight corner or a large garden plot.
Customization extends beyond just size. You can design specific aeration patterns that match your local climate. Hot climates need more ventilation to prevent anaerobic sludge.
Cold regions benefit from insulated double walls that retain heat during winter months. This level of adaptation is rarely available in mass-produced units.
The financial savings are immediate and significant. A basic pallet bin costs nearly nothing if you source free materials. Even a high-end wooden crate build rarely exceeds $50 in hardware costs.
You invest that saved money into better tools or quality soil amendments instead.
Durability is another major factor. Commercial bins often have weak hinges or flimsy latches. Your DIY version can use stainless steel hardware and robust joinery.
This ensures the structure survives years of turning and heavy organic loads. You build it to last, not to be replaced every few seasons.
Choosing Your Build: Pallet, Tumbler, or Stationary Bin?
Selecting the right design depends on your physical ability and space. Each type serves a different user profile and decomposition speed. We must evaluate the pros and cons of each before cutting wood.
| Bin Type | Best For | Effort Level | Speed | Pest Resistance |
|---|---|---|---|---|
| Pallet Bin | Large yards, bulk leaves | Low | Slow (Cold) | Low |
| Stationary Wooden | Suburban gardens, balance | Medium | Medium (Hot/Cold) | Medium |
| DIY Tumbler | Small spaces, back safety | High (Build) | Fast (Hot) | High |
Pallet bins are the easiest to construct. They require minimal tools and no complex joinery. However, they offer poor pest protection and slow decomposition.
Rats can easily chew through standard pallet wood. This option works best for leaf mold or yard waste only.
Stationary wooden bins offer the best balance. They provide enough mass to generate heat. You can add a hinged door for easy harvesting.
This design suits most home gardeners who want reliable results. It requires moderate carpentry skills but yields professional performance.
Tumblers are ideal for those with back issues. They eliminate the need for shoveling or pitching. The enclosed design keeps pests out effectively.
Building a functional tumbler is mechanically complex. You need a sturdy frame and a smooth rotating mechanism. This is best for experienced builders with power tools.
Consider your volume of waste. A small family generates less scrap than a large household. Match the bin capacity to your input.
A 3x3x3 foot stationary bin handles typical weekly kitchen scraps well. Larger families may need a dual-chamber system for continuous processing.
The Blueprint: Essential Tools, Materials, and Safety Checks
Gathering the right materials prevents mid-project frustrations. We recommend using untreated cedar or redwood for longevity. These woods resist rot naturally without chemical leaching.
Avoid pressure-treated lumber as chemicals can harm soil biology.
You will need specific hardware for assembly. Galvanized or stainless steel screws prevent rust stains. Standard steel screws will corrode quickly in the moist environment.
Use 3-inch deck screws for framing and 1.5-inch for paneling. Heavy-duty hinges support the weight of a full lid.
| Item | Specification | Purpose |
|---|---|---|
| Wood | Untreated Cedar/Redwood | Structure and insulation |
| Screws | 3″ Galvanized Deck Screws | Framing and joinery |
| Hardware Cloth | 1/4 inch Galvanized Steel | Rodent proofing base |
| Hinges | Stainless Steel Strap Hinges | Lid and door support |
| Ventilation | 2-inch PVC Pipe or Drilled Holes | Airflow management |
Safety gear is non-negotiable during construction. Wear eye protection when drilling or sawing. Wood splinters and metal shards pose serious eye risks.
Use hearing protection if operating loud power tools for extended periods. Gloves protect your hands from sharp edges and rough lumber.
Check your local ordinances before building. Some HOAs restrict bin visibility or placement near property lines. Ensure your design complies with setback requirements.
Municipal codes may also dictate maximum height or material types. Verify these rules to avoid costly fines or removal orders.
Prepare your site properly. Choose a level spot with partial shade. Full sun dries out the pile too quickly.
Full shade keeps it too wet and cold. A flat base prevents the structure from twisting or leaning over time. Use gravel or pavers for a stable foundation.
Step-by-Step Assembly: Building a Rodent-Proof, Airflow-Optimized Bin
We will focus on a stationary wooden bin design. This offers the best balance of ease and performance. Start by constructing the base frame.
Cut four pieces of 2×4 lumber to your desired width. Screw them together to form a square or rectangle.
Attach hardware cloth to the bottom of the frame. This step is critical for pest prevention. Rats and mice cannot chew through 1/4 inch galvanized steel.
Staple it securely every few inches along the wood. Ensure there are no gaps larger than a quarter inch.

Build the side panels next. Use tongue-and-groove boards for a tight seal. Leave small gaps between boards if you want passive airflow.
Alternatively, drill 1-inch holes in solid panels for controlled ventilation. Space holes every 6 inches across the lower half of the bin.
Assemble the walls on the base frame. Use corner brackets for added stability. Ensure the walls are square before final tightening.
A crooked bin will not close properly later. Install the front panel with hinges if you want a harvest door. This allows you to remove finished compost from the bottom.
Construct the lid separately. Make it slightly larger than the opening to shed rain. Add a handle for easy lifting.
Consider adding a latch to keep raccoons out. Secure the lid with heavy-duty strap hinges. Test the movement to ensure it opens smoothly without binding.
Add ventilation pipes if desired. Insert perforated PVC pipes vertically in the center. This creates a chimney effect for better oxygen flow.
Secure the pipes so they do not shift during turning. This feature significantly boosts decomposition speed in larger piles.
Common Visual Mistakes That Kill Compost Heat and Speed
Visual cues tell you if your bin is working. A common mistake is building walls that are too thick. Solid wood walls without ventilation trap moisture excessively.
This leads to anaerobic conditions and rotten smells. Ensure your design includes adequate air gaps or drilled holes.
Another error is ignoring the base elevation. Placing wood directly on soil causes rapid rot. Elevate the bin slightly on bricks or feet.
This allows air to circulate underneath the structure. It also prevents ground moisture from wicking up into the wood.
Poor lid fit is a frequent oversight. A loose lid lets in too much rain. This saturates the pile and lowers the temperature.
A tight lid retains necessary heat and moisture balance. Check the seal regularly and adjust hinges as needed. Weatherstripping can help create a tighter closure.
Incorrect hole placement reduces efficiency. Drilling holes only at the top starves the bottom of oxygen. Decomposition happens throughout the entire mass.
Distribute ventilation evenly from bottom to top. This ensures aerobic bacteria thrive in all layers of the pile.
Using the wrong fasteners leads to structural failure. Standard nails pull out as wood expands and contracts. Screws hold much better under stress.
Rusting metal weakens the joint over time. Always use corrosion-resistant hardware for outdoor projects. This simple choice extends the life of your bin significantly.
Feeding and Maintaining Your Bin for Fast, Odor-Free Results
Success depends on balancing carbon and nitrogen materials. We call these browns and greens. Browns include dry leaves, cardboard, and straw.
Greens consist of vegetable scraps, coffee grounds, and grass clippings. Aim for a volume ratio of three parts browns to one part greens. This mix ensures proper airflow and nutrient balance for bacteria.
Moisture control is equally critical. The pile should feel like a wrung-out sponge. Squeeze a handful of material to test it.
If water drips out, add more dry browns. If it feels dusty and crumbly, spray it with water. Dry piles stall decomposition completely.
Wet piles turn into smelly sludge.
Turn the contents every one to two weeks. Use a garden fork or compost aerator tool. Mixing introduces fresh oxygen to the center.
This reactivates the aerobic bacteria that generate heat. Turning also prevents compaction and matting. Skip turning if you are cold composting, but expect slower results.
Monitor the temperature regularly. Insert a long-stem thermometer into the center. Readings between 130°F and 160°F indicate active hot composting.
This heat kills weed seeds and pathogens effectively. If temperatures drop below 100°F, the pile needs more greens or moisture. Add a layer of fresh kitchen scraps to boost activity.
Avoid adding meat, dairy, or oily foods. These items attract pests and create foul odors. Stick to plant-based kitchen waste and yard trimmings.
Eggshells are fine but crush them first for faster breakdown. Citrus peels decompose slowly due to their acidity. Chop large items into smaller pieces to speed up the process.
Frequently Asked Questions About DIY Compost Bins
How long does it take to get finished compost?
Hot composting produces usable humus in two to three months. This method requires regular turning and strict carbon-nitrogen balancing. Cold composting takes six to twelve months with minimal effort.
The timeline depends on your local climate and bin size. Warmer weather accelerates microbial activity significantly.
Can I compost in winter with a DIY bin?
Yes, but decomposition slows down considerably. Insulate your wooden bin with straw bales or foam board. This helps retain internal heat during freezing temperatures.
Stop adding wet greens if the pile freezes solid. Resume feeding when temperatures rise above freezing. The microbes remain dormant but do not die.
What do I do if my bin smells bad?
Bad odors usually mean the pile is too wet or lacks air. Add dry browns like shredded paper or dry leaves immediately. Turn the pile thoroughly to introduce oxygen.
Avoid adding more food scraps until the smell subsides. Ensure your drainage holes are not blocked by soil.
Do I need to shred materials before composting?
Shredding speeds up decomposition by increasing surface area. Run dry leaves through a mower before adding them. Chop vegetable scraps into small chunks.
Large items like whole melons take months to break down. Smaller pieces allow bacteria to access nutrients faster. This simple step cuts curing time in half.
How do I know when the compost is ready?
Finished compost looks dark and crumbly like soil. It should have an earthy, pleasant smell. You should not recognize any original food items.
Perform a bag test to confirm maturity. Seal a sample in a plastic bag for two days. If it smells sour when opened, it needs more time.

Similar Posts