How to Make DIY Milk Paint for Furniture

Picture this: You spot an old wooden chair in your attic, dusty and forgotten. It whispers stories of family gatherings from decades ago. You want to revive it, but store-bought paints feel too harsh, too chemical-filled. What if you could mix a finish right at home that brings out its soul? That’s the magic of DIY milk paint for furniture.
Milk paint is a simple blend of natural items like milk protein, lime, and earth pigments. It creates a soft, matte look that ages beautifully, like a well-loved heirloom. Craftspeople have turned to it for ages to give wood that authentic, worn charm. You mix it fresh, apply it thin, and watch it transform raw timber into something timeless.
The pull toward green options grows strong. The global bio-based paints market hit USD 12.05 billion in 2023 and projects a 9.4% yearly rise through 2030, per MarkNtel Advisors. Folks crave low-VOC choices that keep homes safe. A study in the International Journal of Environmental Research and Public Health notes that VOCs from standard paints harm indoor air, especially for kids and pregnant women. Milk paint skips those risks. It uses zero VOCs, making it a smart pick for family spaces.
In this guide, we dive deep. You learn the history, recipes, and tips to nail that perfect chipped edge. Ready to roll up your sleeves and breathe new life into your pieces? Let’s mix some color.
The Rich History of Milk Paint: From Caves to Colonial Homes
Milk paint isn’t new. It roots deep in human creativity. Think back 49,000 years. Archaeologists at Sibudu Cave in South Africa found a stone tool coated in a mix of ochre and wild bovid milk casein. This early blend held fast through millennia, as detailed in a PLoS ONE study. Our ancestors used it to mark tools and walls, blending art with survival.
Fast forward to ancient Egypt. When explorers cracked open Tutankhamun’s tomb in 1922, they uncovered boats, statues, and chairs painted with goat’s milk lacquer. That finish gleamed after 3,000 years sealed away. Milk acted as the binder, locking pigments in place without modern chemicals.
By the 1600s, European travelers carried pigment pouches. They mixed on-site with farmers’ milk and lime for vibrant coatings on carts and homes. Recipes spread via almanacs. In 1803, French chemist Cadet de Vaux penned a formula in his “Memoire.” It beat distemper paint: cheaper, quicker dry, no foul smells. English translations hit New England shores soon after, fueling Shaker and Colonial styles.
Shakers prized it for simplicity.
Their plain benches and cabinets got a single coat, revealing wood grain beneath chips. One unknown fact: Milk paint helped hide imperfections in hand-hewn lumber. Crafters sanded little, letting the paint’s translucency do the work. It saved time in austere communities.
In America, itinerant painters roamed. They hawked pigments door-to-door, blending batches in kitchens. A 1830 guide by P.F. Tingry lists tweaks: Add linseed oil for sheen, or Spanish white for opacity. These touches made it versatile for floors, walls, and yes, furniture.
Today, we nod to that legacy. But modern twists keep it fresh. Studies from the Endeavour Centre highlight its casein glue-like bond. Lime unlocks the protein, creating a tough film on wood. Unlike oil paints, it doesn’t yellow over time. That durability? It explains why cave art endures.
One quirky tale: During World War II shortages, rural families stretched rations by curdling skim milk for paint. It coated barns and toys, proving resourcefulness. Now, as eco-trends boom—the furniture paint market jumped from $9.66 billion in 2023 to $10.20 billion in 2024, says The Business Research Company—we reclaim it. Milk paint bridges past and present, turning everyday wood into storytellers.
Why Choose DIY Milk Paint for Your Furniture Projects?
You stand in your workshop, brush in hand. Why pick milk paint over latex or oil? It boils down to feel, safety, and style. This paint hugs wood like an old friend, revealing knots and grains for a lived-in vibe.
First, the green edge. Standard paints release VOCs that linger in air, linked to headaches and worse in EPA reports. Milk paint? Zero VOCs. It’s biodegradable, made from farm basics. The low-VOC paint market eyes $12.26 billion by 2030, per Mordor Intelligence, driven by health worries. You paint worry-free, even around pets or little ones.
Durability surprises many. Casein forms a hard shell, resisting scratches better than chalk paints. A Bob Vila test showed it outlasting water-based options on high-traffic tables. Yet it chips on purpose, mimicking 200-year-old dressers. Control that: Thin mixes flake more; thick ones cling tight.
Versatility shines. It soaks into raw pine or oak, but bonds to metal with lime boosts. Colors mute to earthy tones—think barn red or slate gray—that pop against white trim. Unlike glossy enamels, its matte sheen softens rooms, per interior design pros.
Cost adds appeal. Home mixes beat $15 powder packets. You control batches, avoiding waste. Plus, the joy: Kneading curds feels crafty, like channeling Grandma’s kitchen.
Drawbacks? It dries fast—use it quick. And seal it, or moisture warps the bond. But those quirks build character. Imagine your nightstand: Fresh coat, light distress, wax top. It fits farmhouse chic or modern minimalism.
Real talk from users: On Reddit’s r/woodworking, folks rave about its non-toxic bite for toys. One shared a crib redo—safe, stunning, story-worthy. Choose milk paint, and you craft not just furniture, but legacy.
Ingredients and Tools: What You Need to Get Started
Gather your supplies. Keep it simple, like a farm recipe. Focus on quality for smooth results.
Core Ingredients for Classic Milk Paint
- Skim milk: 1 quart. The protein (casein) binds everything. Whole milk works but curdles thicker—skim flows best.
- Hydrated lime (calcium hydroxide): 1-2 tablespoons. Activates casein for stick. Find it at hardware stores; handle with gloves—it’s caustic wet.
- Natural pigments: 4-6 tablespoons. Earth ochres for reds, umbers for browns. Art shops stock them; avoid synthetics for true vibe.
- Lemon juice or vinegar: 2-3 tablespoons. Curdles milk overnight. Fresh squeezes yield creamier curds.
Optional Add-Ins for Custom Twists
- Borax: 1 teaspoon per quart. Extends shelf life to days; skip for purest mix.
- Linseed oil: 1 teaspoon. Boosts flow on slick woods.
- Chalk powder: 1 tablespoon. Thickens for opaque coats.
Essential Tools
- Large glass bowl: For mixing; avoid metal—it reacts.
- Cheesecloth or fine sieve: Strains whey from curds.
- Wooden spoon or whisk: Blends without scratching.
- Natural-bristle brush: Holds thin paint well; synthetics shed.
- Fine-grit sandpaper (220-grit): Smooths between layers.
- Drop cloth: Catches drips; old sheets work.
Pro tip: Scale up for big pieces. A bureau needs double. Store dry pigments in jars— they last years. With these, you’re set to create.
Step-by-Step Guide: How to Make DIY Milk Paint from Scratch
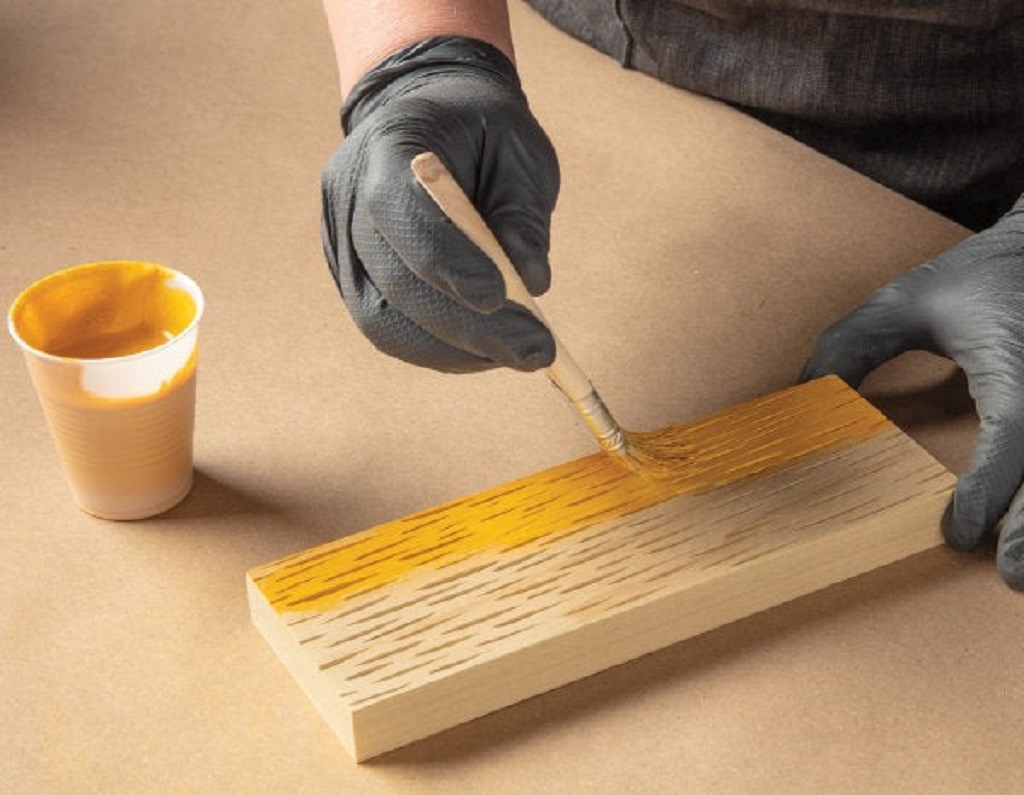
Roll up sleeves. This process feels like alchemy—milk turns to treasure. We break it into clear steps. Aim for a quart batch; covers a chair or table.
Step 1: Curdle the Milk
Pour 1 quart skim milk into a bowl. Add 2 tablespoons lemon juice. Stir gently. Cover loosely. Let sit at room temp 8-12 hours. Bubbles form, then curds separate from whey. That’s casein waking up. Unknown fact: This mimics ancient methods, where heat sped it, but room temp keeps flavors pure.
Step 2: Strain the Curds
Line a sieve with cheesecloth over a sink. Pour mix in. Twist cloth, squeeze whey out. Rinse curds under cool water—removes sour tang. Keep damp; dry curds grit the paint. Yield: About 1 cup curds.
Step 3: Activate with Lime
In a clean bowl, mash curds with a fork. Sprinkle 1 tablespoon lime. Stir to paste. It heats slightly—chemical magic. Add water drop by drop for creaminess. Like thin yogurt.
Step 4: Mix in Pigments
Wear a mask. Add 4 tablespoons pigment slow. Whisk till no lumps. Test on scrap wood: Too thick? Thin with curd water. Too sheer? More pigment. Colors deepen as it dries—swatch first.
Step 5: Rest and Use
Let sit 20 minutes. Lime bonds fully. Stir before each dip. Paint lasts 1-3 days chilled; toss if it chunks.
Troubleshoot: Lumpy? Blend smooth. Weak bond? Up lime. Your first batch teaches—embrace it.
Variations of DIY Milk Paint Recipes for Different Effects
One recipe fits all? Not quite. Tweak for looks. Here are three spins.
Quick Powdered Version (For Beginners)
Mix 1/2 cup non-fat milk powder, 1/2 cup water, 1 tablespoon lime. Whisk smooth. Add pigment. Ready in minutes. Great for small jobs; stores dry forever.
Borax-Boosted Long-Lasting Blend
To base recipe, add 1 teaspoon borax post-lime. It preserves casein. Keeps 6 months sealed. Ideal for bulk; per Real Milk Paint Co., it mimics industrial casein without formaldehyde.
Oil-Infused Glossy Finish
Stir 1 teaspoon boiled linseed oil into wet mix. Applies silkier on hardwoods. Dries with subtle sheen. Historical nod: 19th-century painters used it for parlor chairs.
Each variation shifts vibe. Powdered suits speedy; borax, planners; oil, elegance. Experiment—your wood guides you.
Preparing Your Furniture: Surface Tips for Best Results
Prep sets success. Milk paint loves raw wood but forgives flaws.
Clean Thoroughly
Wipe with TSP substitute. Removes grease, dust. Rinse well; dry 24 hours.
Sand Smart
For unfinished: Light 220-grit scuff. Reveals pores for grip. Finished pieces? Sand to bare if chipping wanted; prime slick surfaces.
Prime if Needed
Raw softwoods soak paint. Mix 1:1 paint-water primer. One coat blocks thirst.
Test Spot
Dab on underside. Check adhesion after hour. Adjust mix.
Case study: I revived a pine dresser. Skipped sand—chips galore. Sealed with wax; it thrives in my hall five years on.
Applying DIY Milk Paint: Techniques for a Flawless Finish
Brush in hand. Apply thin—milk paint hates puddles.
Layering Basics
Stir often. Use horizontal strokes on flats. Two coats minimum; dry 1 hour between. Third for depth.
Tools That Work
Natural brush for grain-follow; foam roller for speed on panels. Spray for pros—thins to mist.
Drying and Curing
Air dry 24 hours per coat. Full cure: 7 days. Warm spots speed it; humidity slows.
Pro move: Work sections. Turn piece for even flow.
Creating That Coveted Chipped and Distressed Look
The chippy charm? Milk paint’s gift. It peels naturally on raw wood.
Encourage Chips
Apply uneven coats. Wet sand lightly post-dry. Reveals underlayers.
Distress Tools
Steel wool (0000) buffs edges. Chain or knife scratches mimic wear. Sand corners heavy—hands grab there.
Layer Colors
Base dark, top light. Distress reveals contrast. Example: Red under gray for barn fresh.
From forums: Users swear by oven heat (low, 10 mins) for controlled flakes. Test small.
Sealing and Protecting Your Painted Furniture
Bare milk paint? Porous. Seal for life.
Top Coat Options
- Wax: Beeswax paste buffs to satin. Reapply yearly.
- Hemp oil: Natural shine; food-safe for tables.
- Polyurethane: Water-based for tough; matte version keeps vibe.
Application
Buff thin. One coat suffices; cure 48 hours.
Durability note: Sealed pieces withstand spills, per Woodworkers Journal tests.
Troubleshooting Common Issues with DIY Milk Paint
Hits a snag? Fix it.
- Clumps: Over-whisk; strain again.
- Poor Adhesion: More lime; sand deeper.
- Uneven Color: Stir constant; thin coats.
- Sour Smell: Normal wet; fades dry.
Recall: My first try curdled wrong—vinegar swap saved it.
Creative Ideas: DIY Milk Paint Projects for Every Room
Spark ideas. Milk paint fits anywhere.
Bedroom Bliss
Coat a headboard in soft blue. Distress edges for cozy.
Kitchen Charm
Revive cabinets seafoam green. Seal heavy—daily use.
Outdoor Accents
Blend with oil for benches. Fades gracefully.
Case: A friend painted Adirondack chairs ochre. Five summers strong.
Safety and Sustainability: Painting Green with Milk Paint
Breathe easy. No fumes mean open windows optional. Gloves for lime; mask for pigments.
Eco-win: Biodegradable scraps compost. Low-VOC trend? Milk leads, per IMARC Group—green coatings at $93.4 billion in 2024.
Conclusion
You started with a hook: That attic chair waiting. Now, you hold the tools—history, recipes, tips—to make it shine. DIY milk paint blends natural power with easy joy. It chips just right, seals strong, and stays safe. From cave origins to your table, it proves timeless.
Grab milk, lime, pigments. Pick a piece. Mix, paint, distress. Share your before-and-after. Your home deserves this glow. Start today—what waits for you?
FAQs
What surfaces work best with DIY milk paint for furniture?
Raw or unfinished wood grips tightest. It soaks in for durable bond. Finished pieces need sanding or primer for hold.
How long does homemade milk paint last once mixed?
Use within 1-3 days. Refrigerate to stretch. Borax adds weeks, but fresh tastes best.
Can I use whole milk instead of skim for milk paint?
Yes, but skim curdles smoother. Whole adds fat that may separate; strain extra.
Does milk paint need a top coat for protection?
Always. Wax or oil shields from moisture and wear. Skip it, and chips turn to peels.
Is DIY milk paint safe for kids’ furniture?
Totally. Zero VOCs, natural base. Seal well for easy wipes.
Related Topics: Benefits of Using a Cast Iron Skillet Daily
References

Similar Posts